Create an account, recharge your balance, then choose one billing option. You only need to follow the steps shown for your choice.
Start here
Create and access your account
Register with your email address, then sign in to the LinknLink AI platform.
1
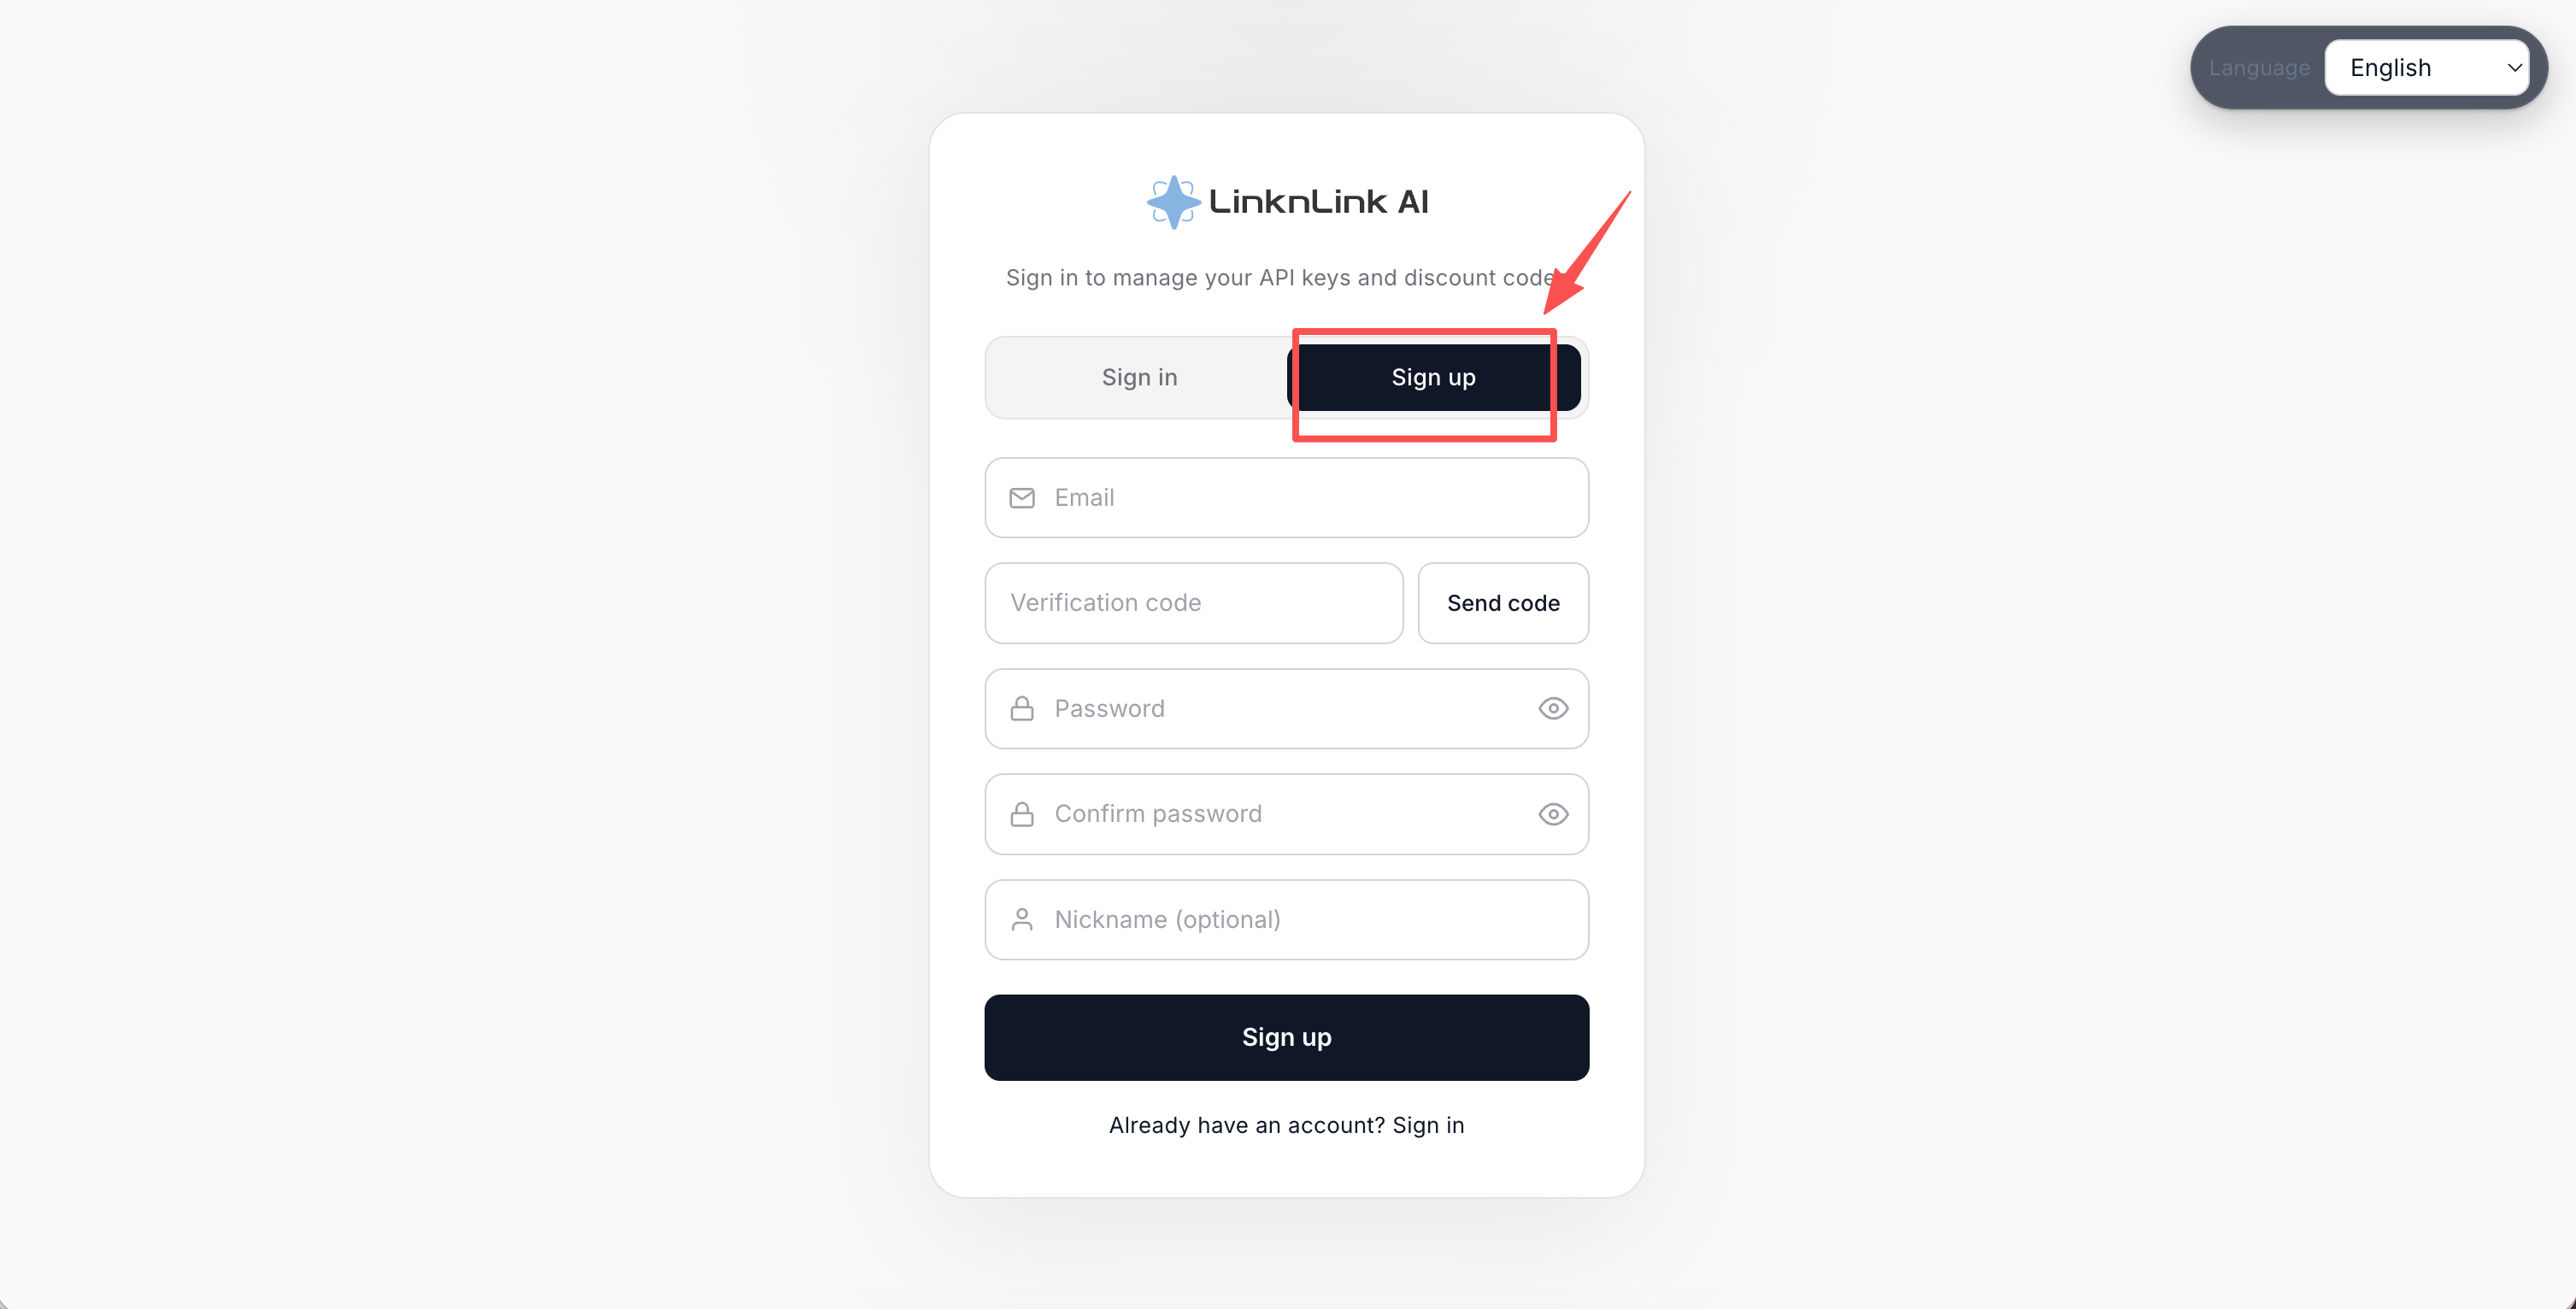
Sign up
Open the LinknLink AI platform and click the Sign up tab. Type in your email address and click Send code. A code arrives in your inbox. Fill in that code, choose a password, then type the same password again to confirm it. The nickname box can be left empty.
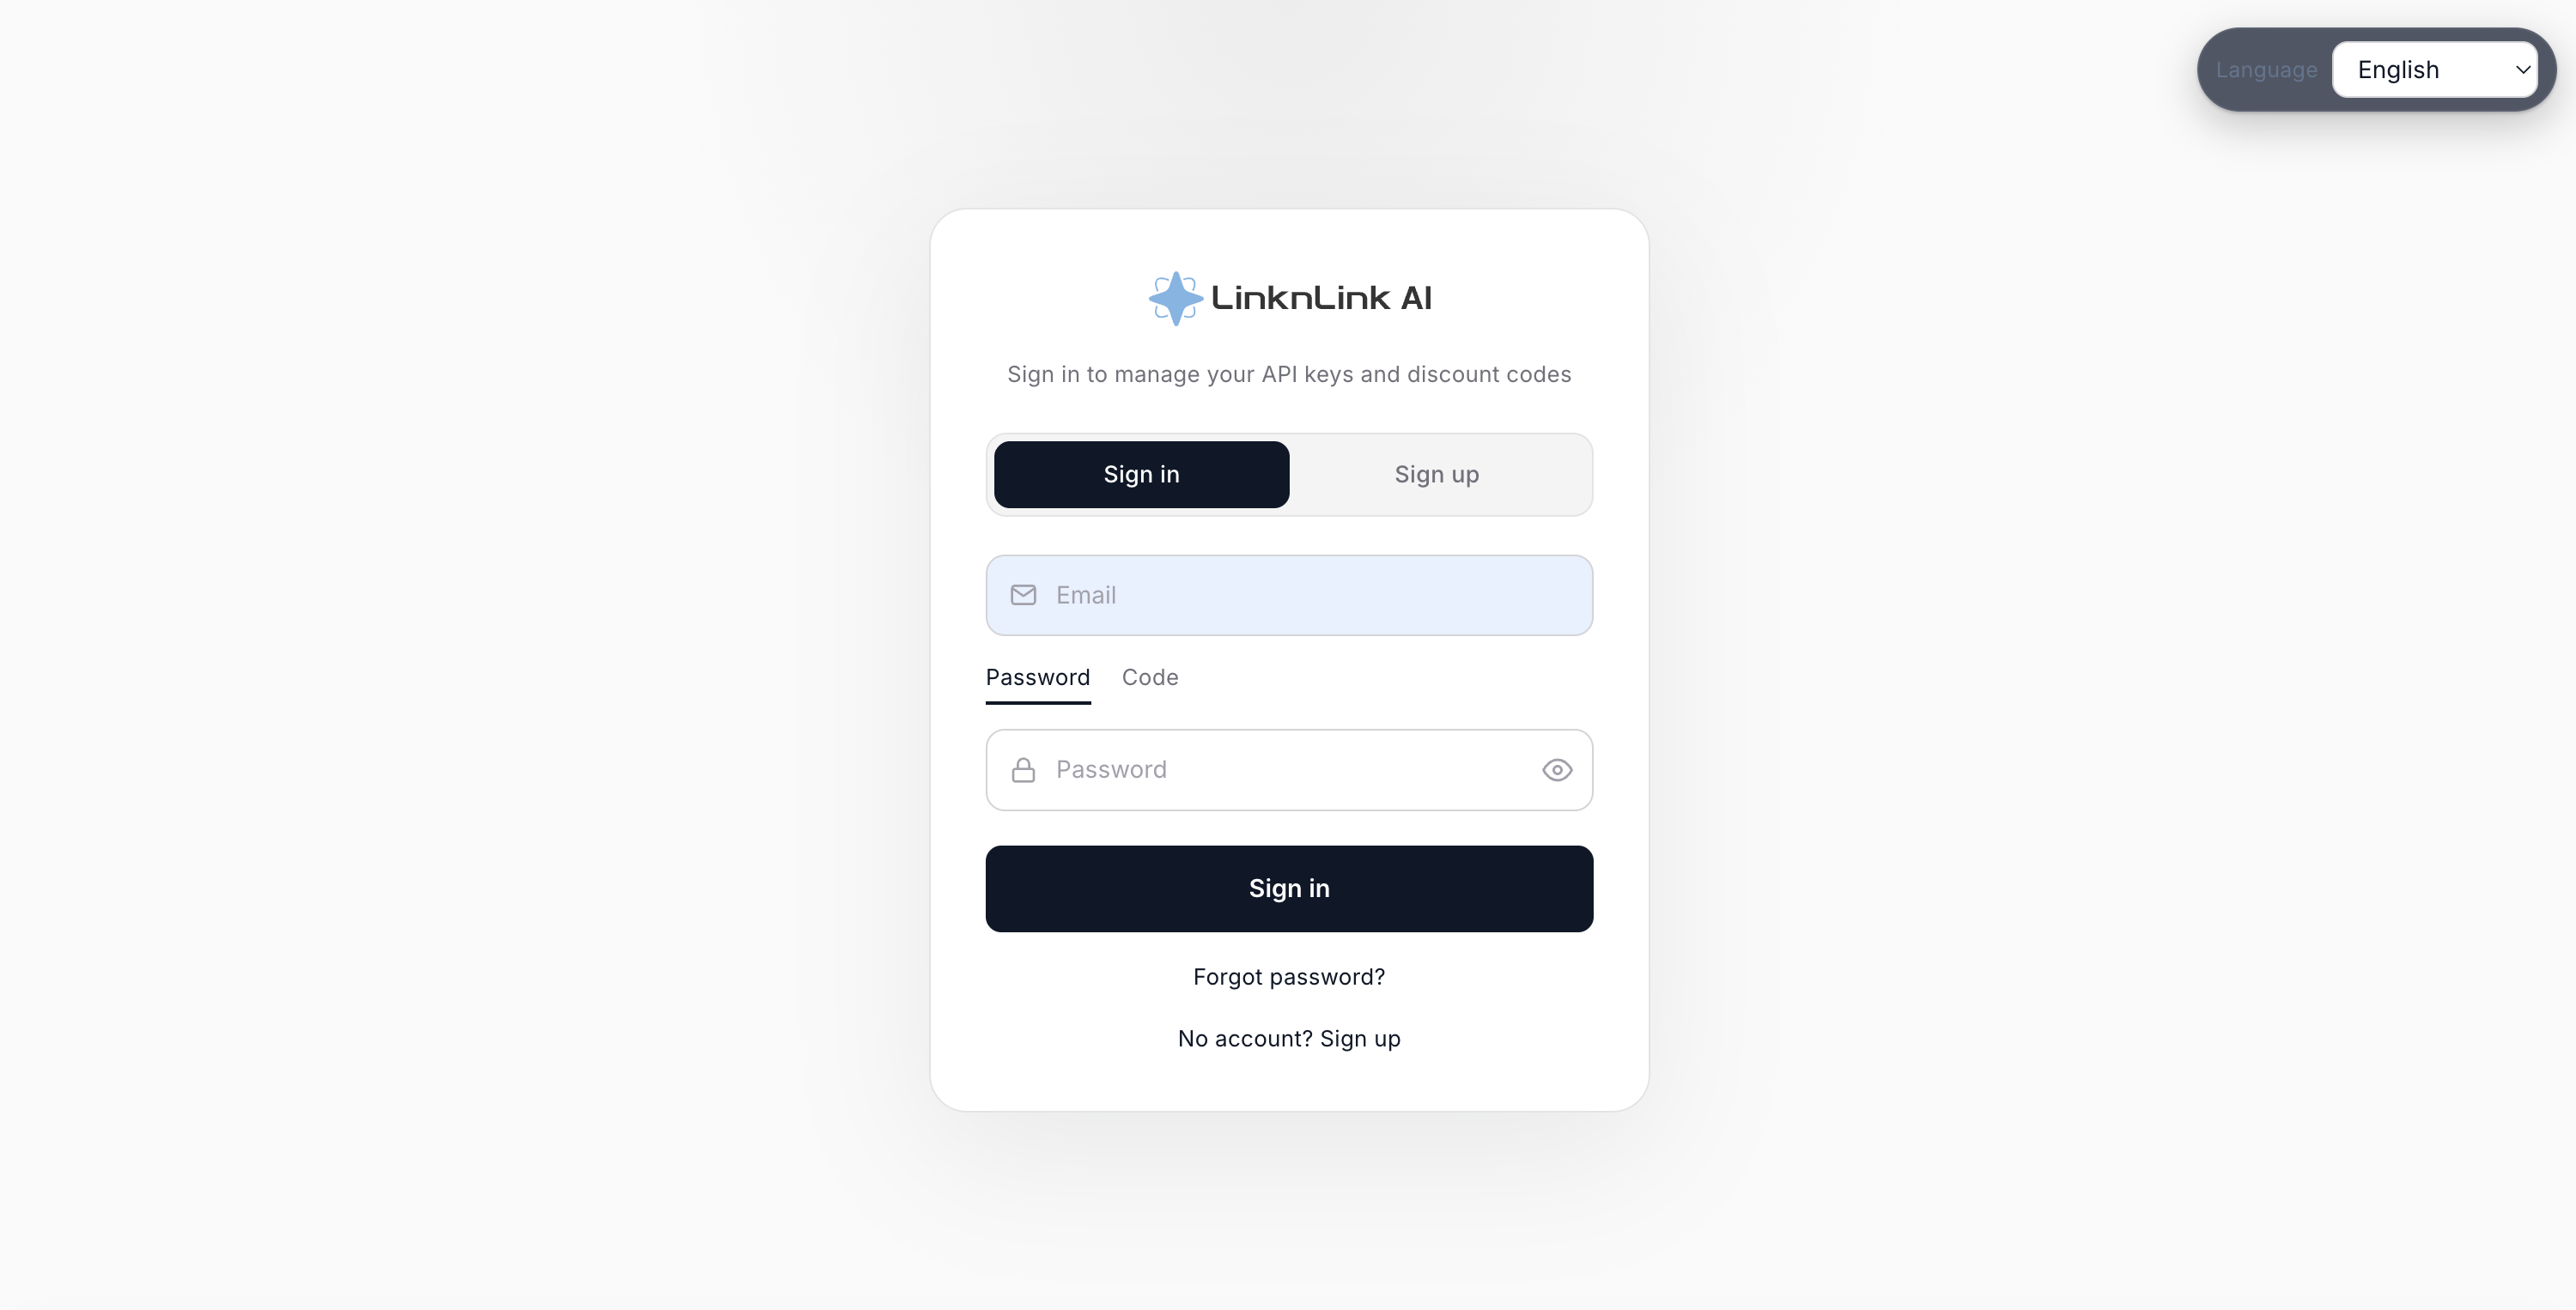
Select Sign in and enter your registered email address and password. After signing in, you will see Subscription and Pay as you go in the left menu. Do not configure both: you will choose one after recharging your balance.
Figure 2Sign in
+
Optional
Redeem a cash voucher or bind a discount code
Skip this section if you do not have a cash voucher or discount code.
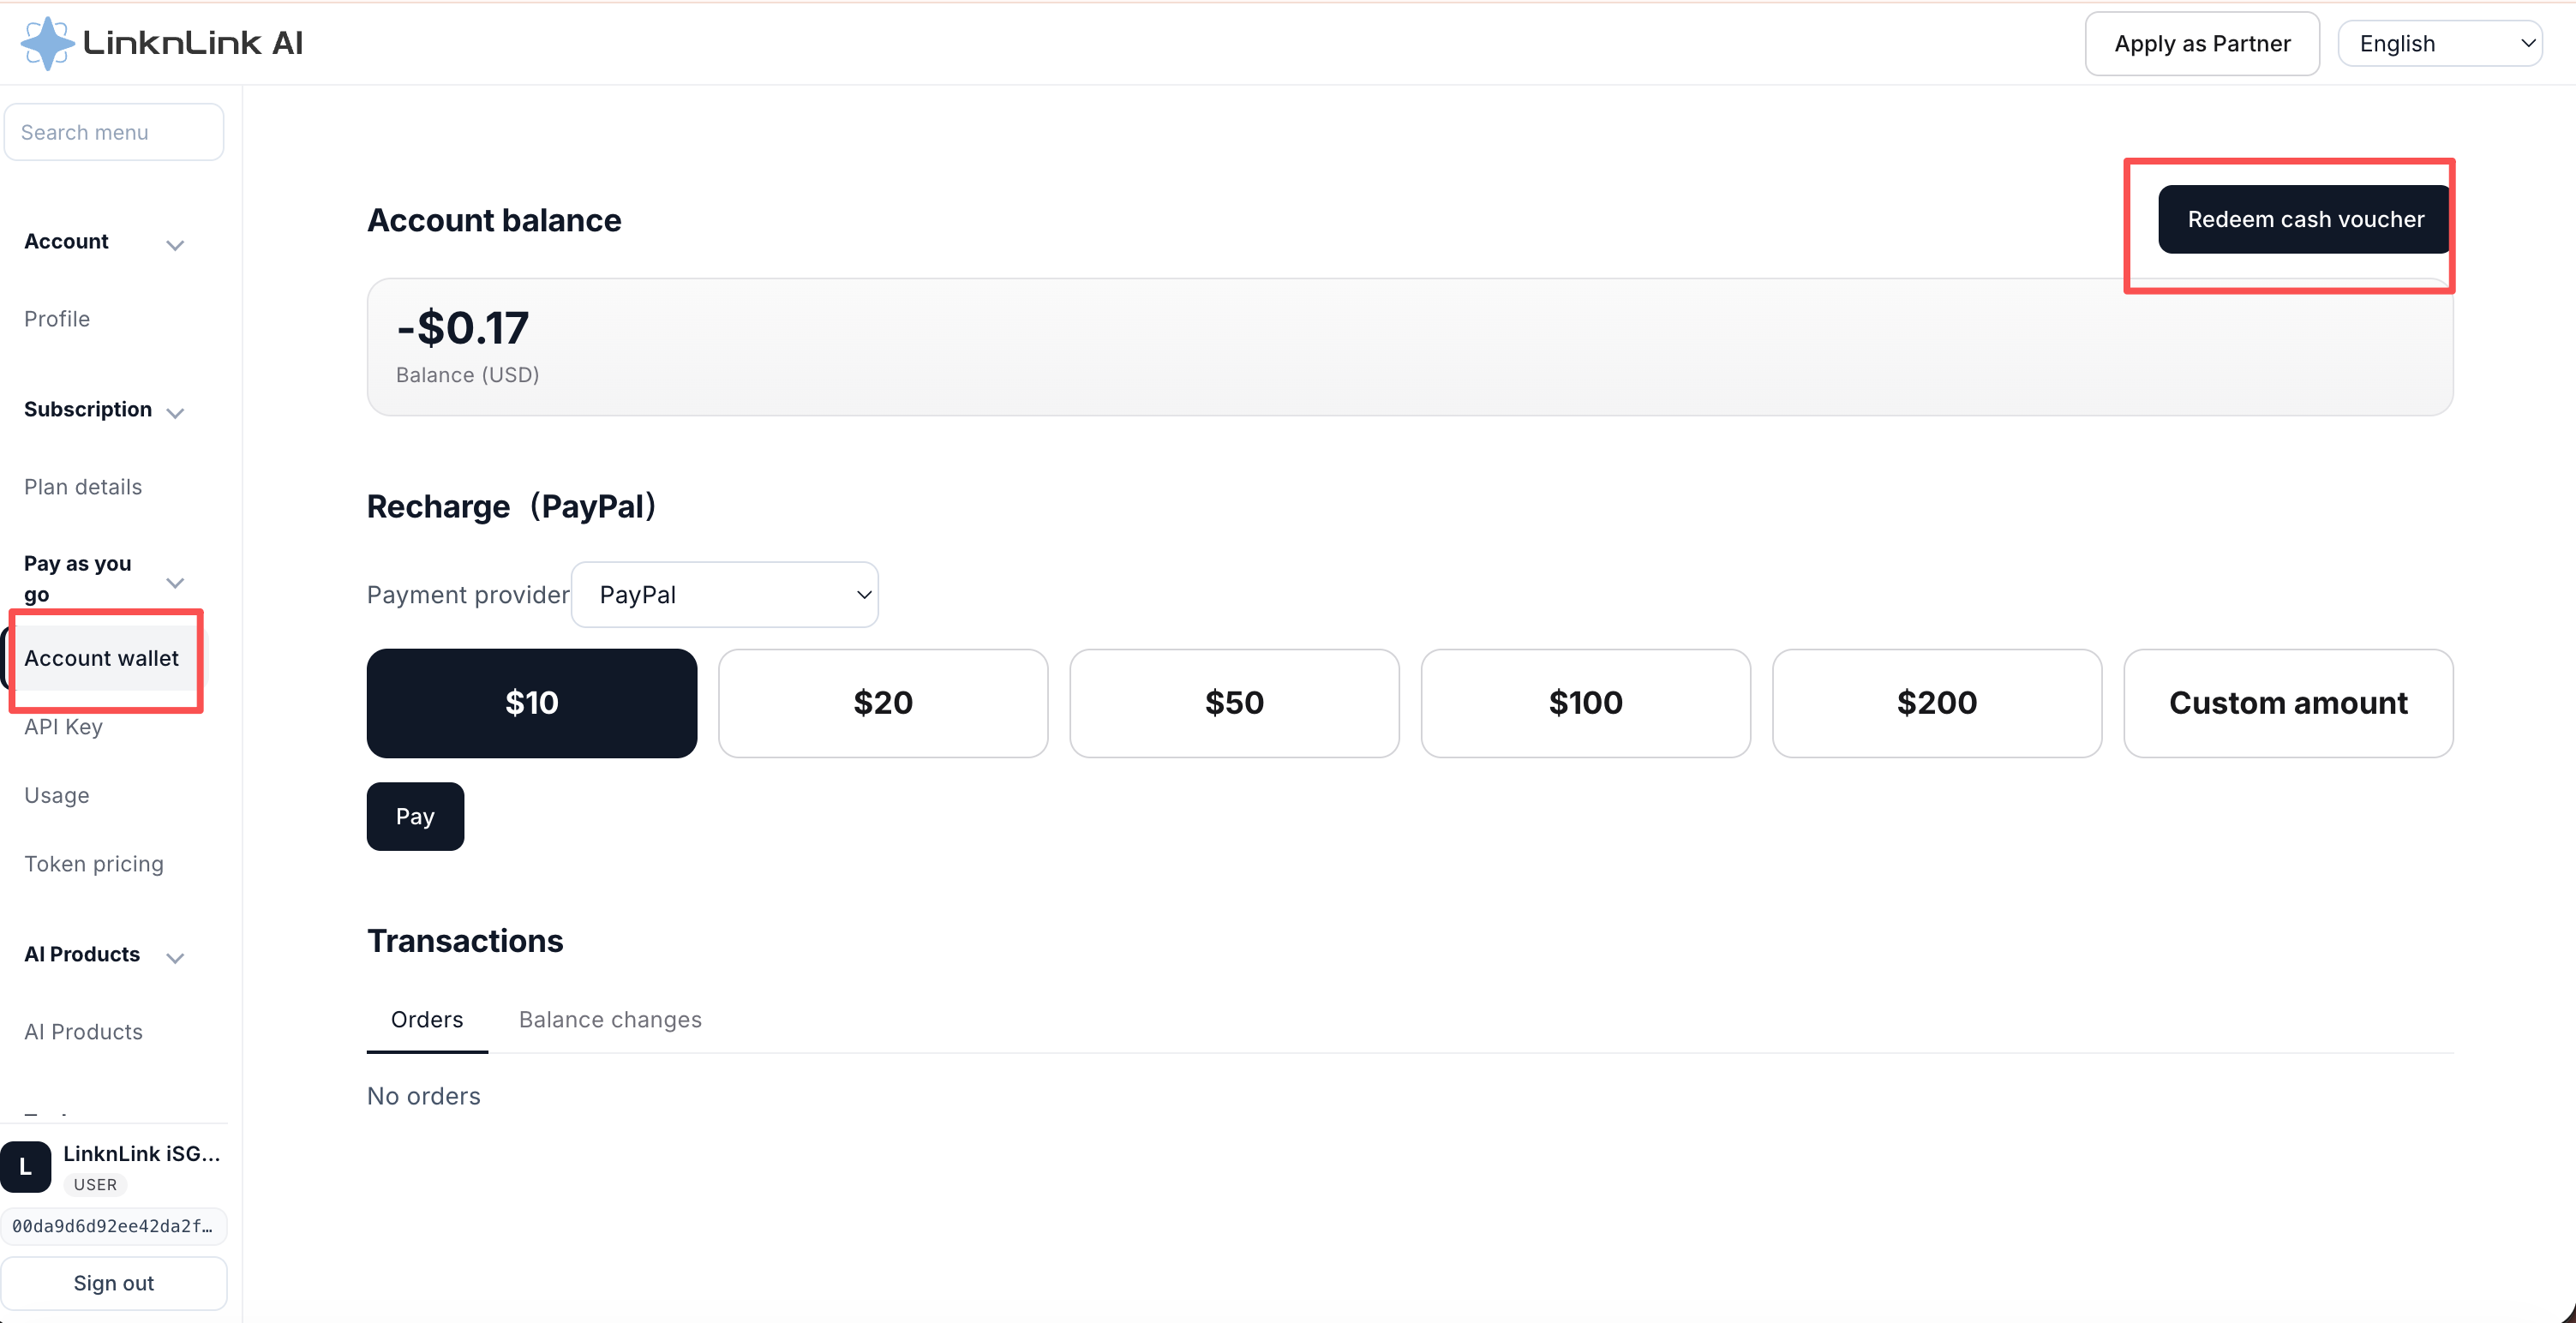
A cash voucher adds money to your account balance. You can use that balance for pay-as-you-go requests or to buy a subscription plan. Go to Pay as you go → Account wallet and select Redeem cash voucher.
Figure 3Redeem a cash voucher
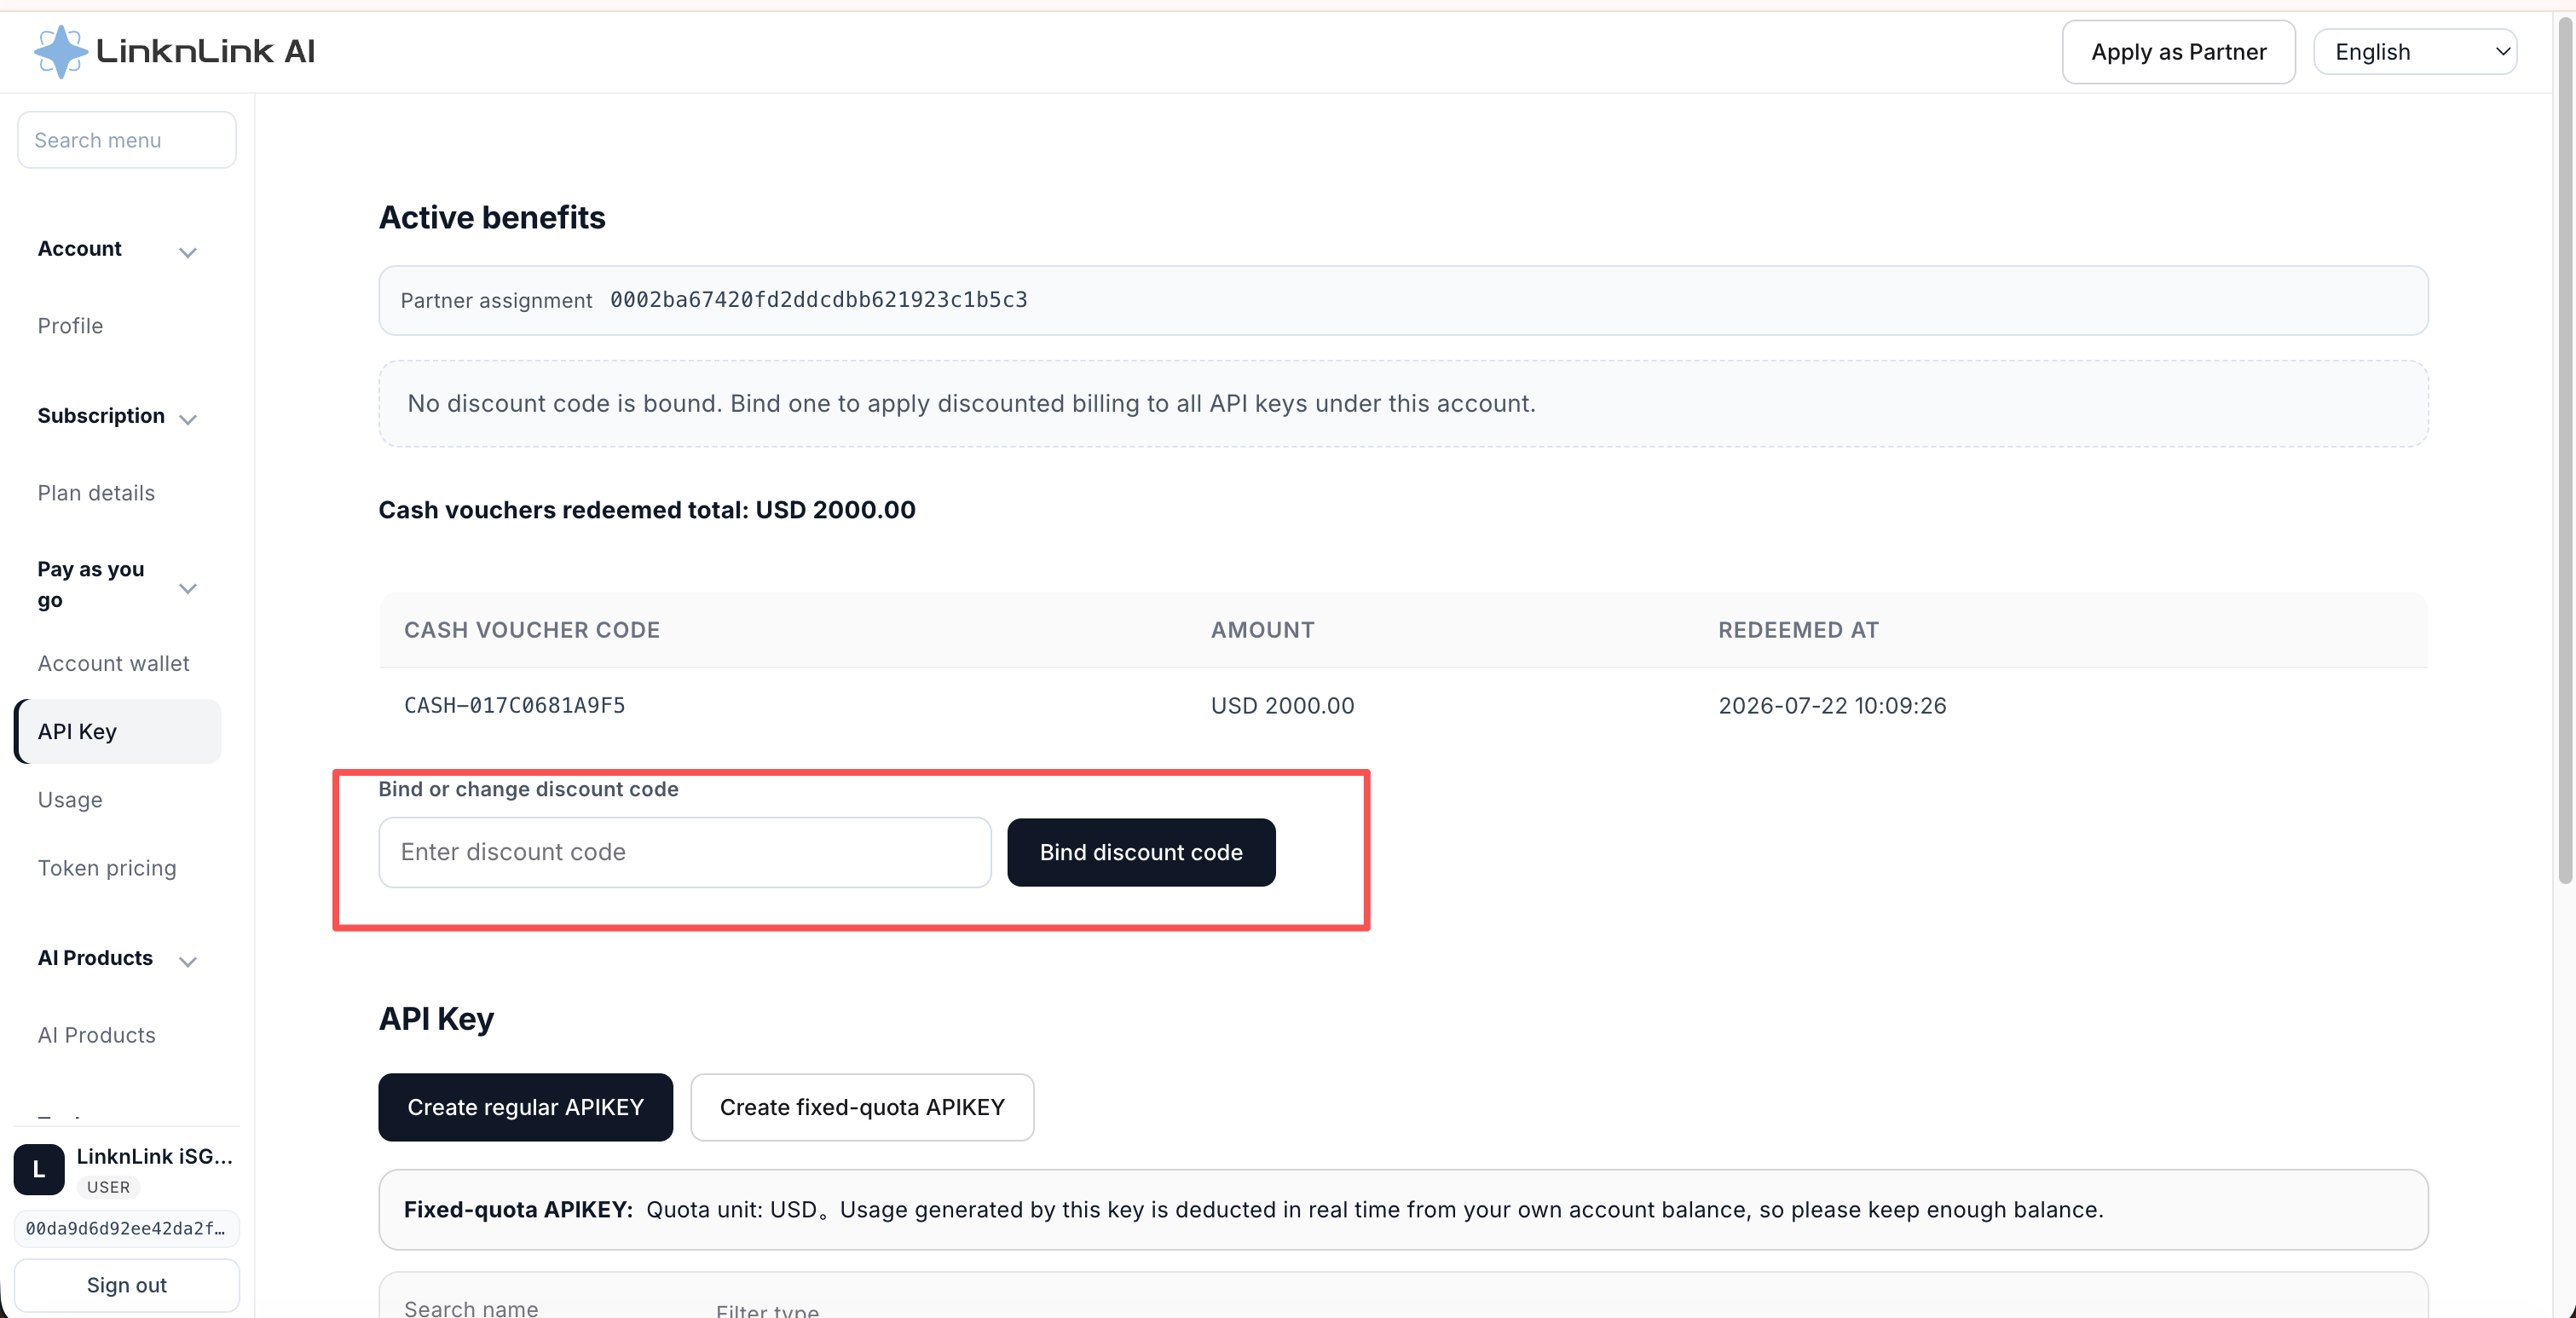
A discount code makes everything on your account cheaper. Go to Pay as you go, then API Key, type the code into the Bind or change discount code box, and click Bind discount code.
Figure 4Bind a discount code
Required for both options
Recharge your account balance
Both pay-as-you-go usage and subscription purchases require account balance. Complete this step before choosing a billing option.
3
Add money before continuing
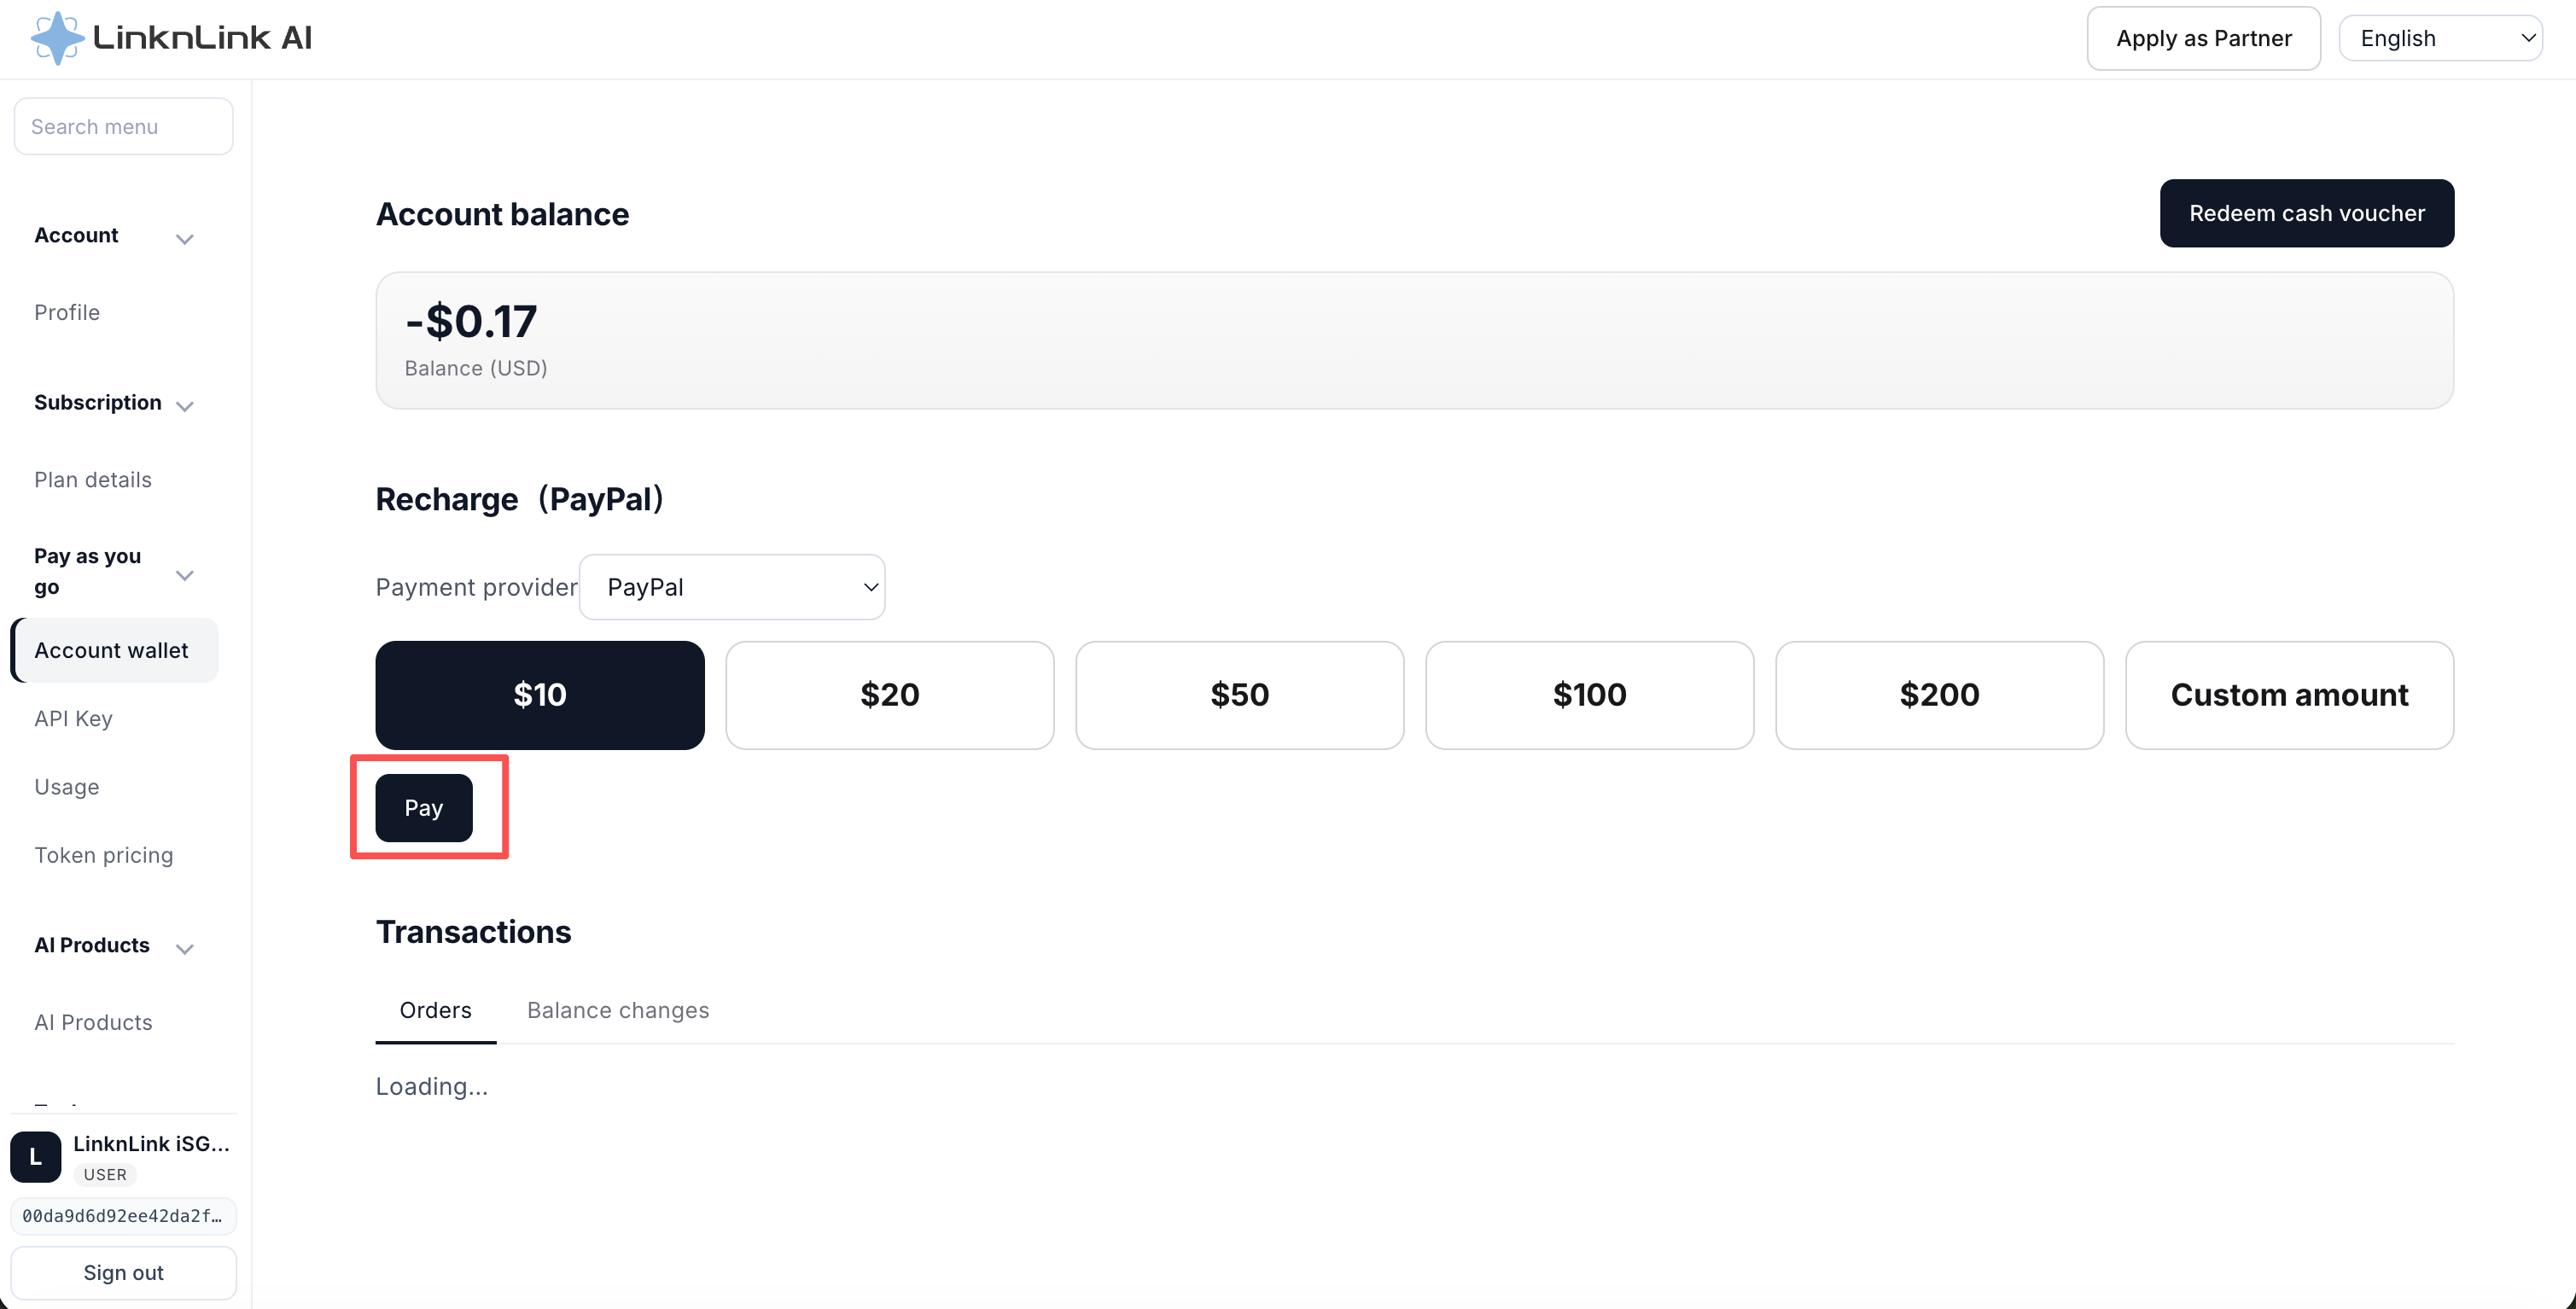
Go to Pay as you go → Account wallet. Under Recharge (PayPal), select one of the amounts shown or enter your own amount, then select Pay.
Figure 5Recharge your balance
Pay as you goEach API request deducts its usage charge from your account balance.
SubscriptionThe plan price is deducted from your account balance when you purchase the plan.
Recharge payments are processed through PayPal and your balance is held in US dollars. Make sure the balance covers either your expected usage or the full price of your selected plan.
Choose one path
How do you want to be billed?
Select one option below. The page will show only the API Key and test steps for that option—you do not need to complete both.
Select a billing option above to continue.
Selected path
Pay as you go
Create a regular API Key and test it. Charges will come from the balance you recharged in Step 3.
4
Create and copy a regular API Key
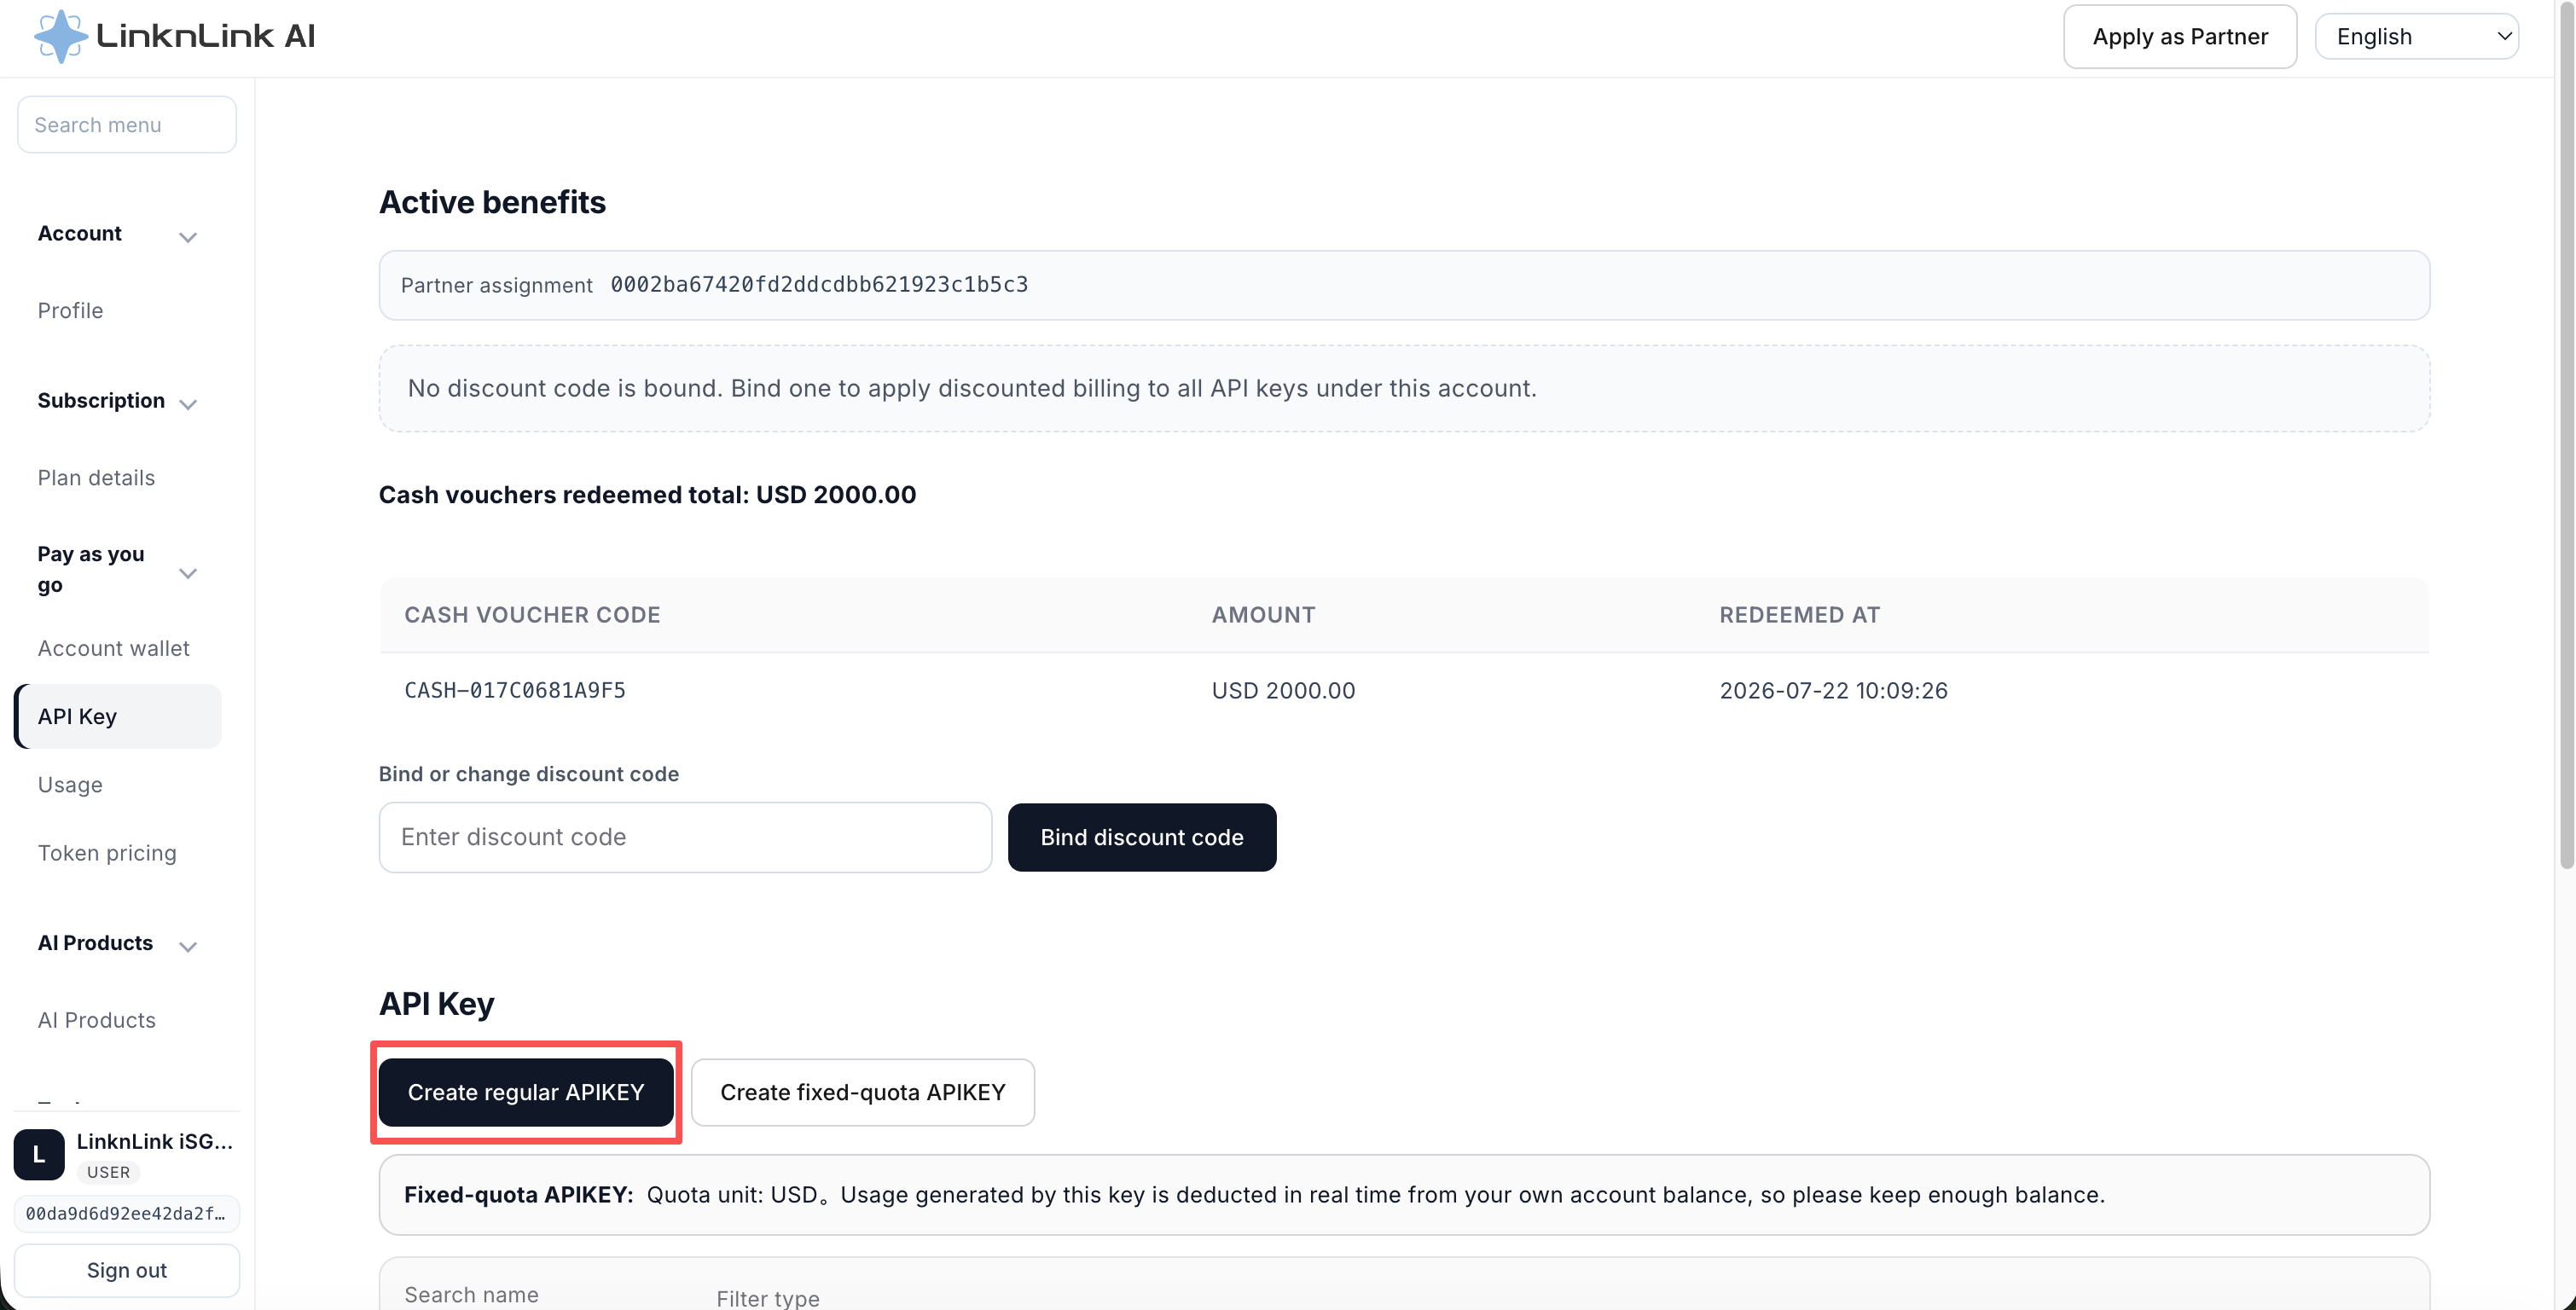
Go to Pay as you go → API Key and select Create regular APIKEY. Enter a name for the key, then create it.
Figure 6Create a regular API Key
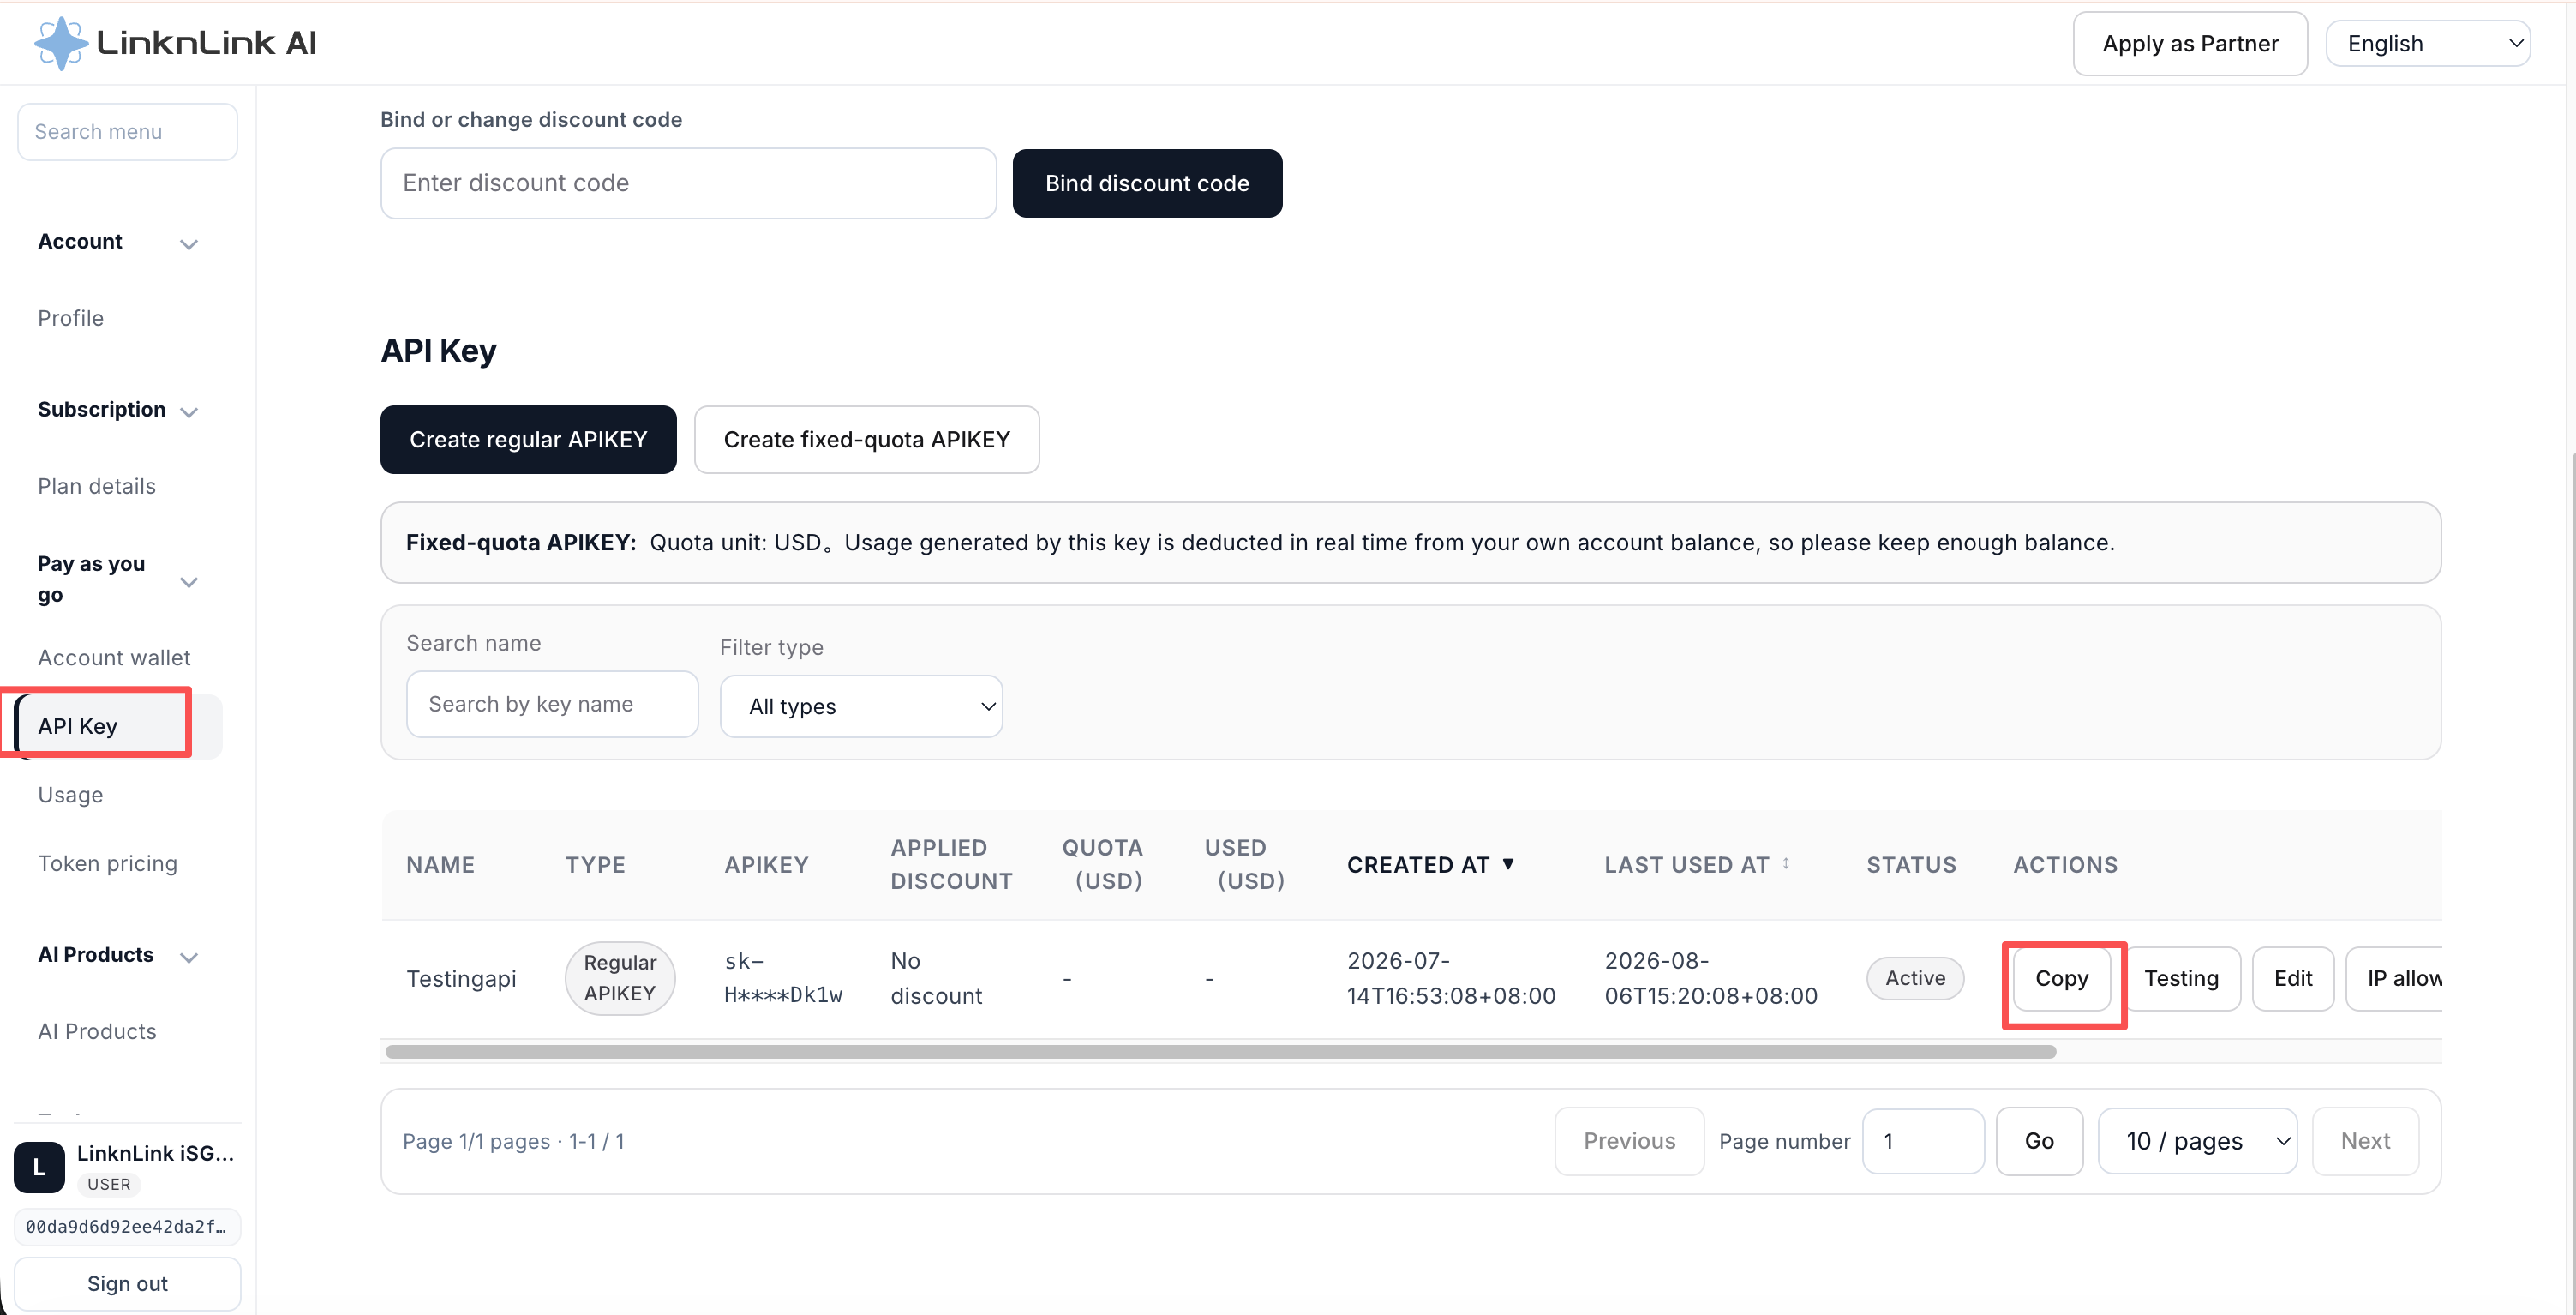
Select Copy in the Actions column to copy the complete key. Store it securely and never share it publicly. Anyone with this key can use your account balance.
Figure 7Copy the key
A fixed-quota API Key also uses your account balance, but lets you set a spending limit. Use one when you want to give somebody controlled access.
5
Test the regular API Key
Open the platform's built-in Playground to test the key directly. You do not need to write or run a command in Terminal.
Select the regular API Key you just created in the API Key dropdown.
Choose a model, enter a short message, and send it. A model response confirms that the key is ready to use.
Figure 8Test the API Key in Playground
Selected path
Subscription
Buy a plan with your account balance, then get and test the API Key assigned to that plan.
4
Buy a subscription plan with your balance
Go to Subscription, choose a plan, and confirm the purchase. The full plan price is deducted from the account balance you recharged in Step 3. The plan becomes available as soon as the purchase succeeds.
If your balance is lower than the plan price, return to Account wallet and recharge the difference before trying again.
5
Get the plan API Key
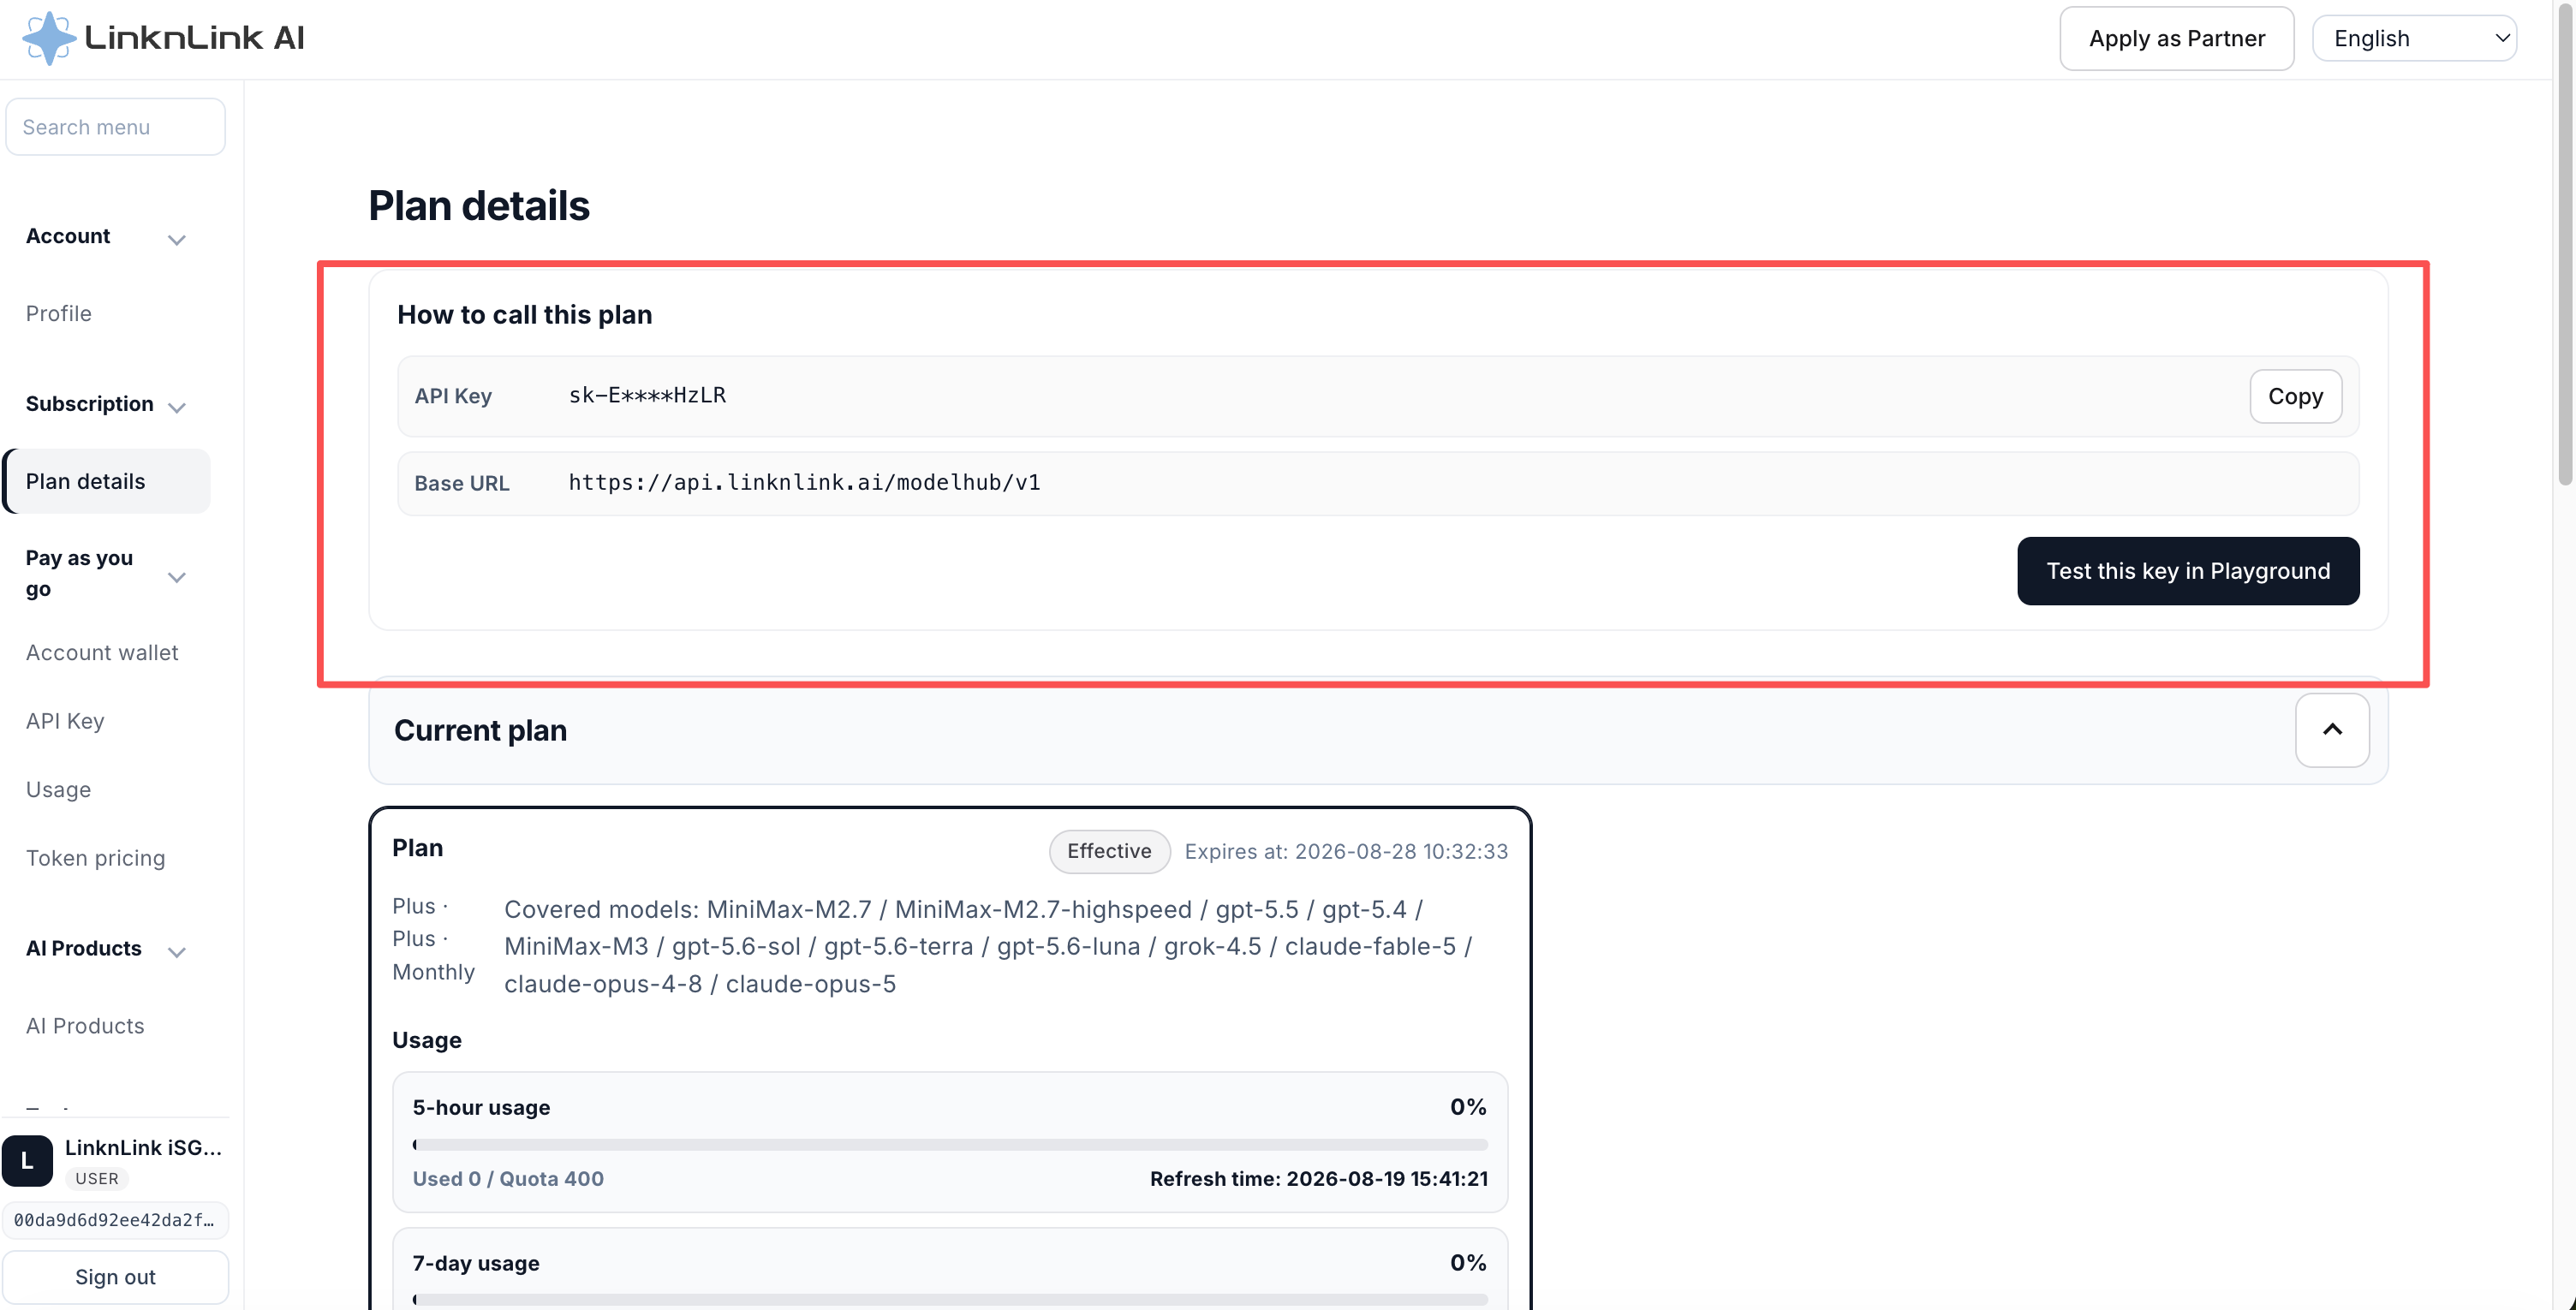
Go to Subscription → Plan details. Under How to call this plan, copy the API Key and Base URL. This API Key belongs to the plan and is different from a regular pay-as-you-go API Key.
Figure 9Copy the plan API Key and Base URL
Current plan lists the models included in your plan, your remaining allowance, and the next reset time. Use one of those model names when making a request.
After purchase, requests made with the plan API Key consume the plan allowance. They do not deduct normal pay-as-you-go usage charges from your account balance.
6
Test the plan API Key
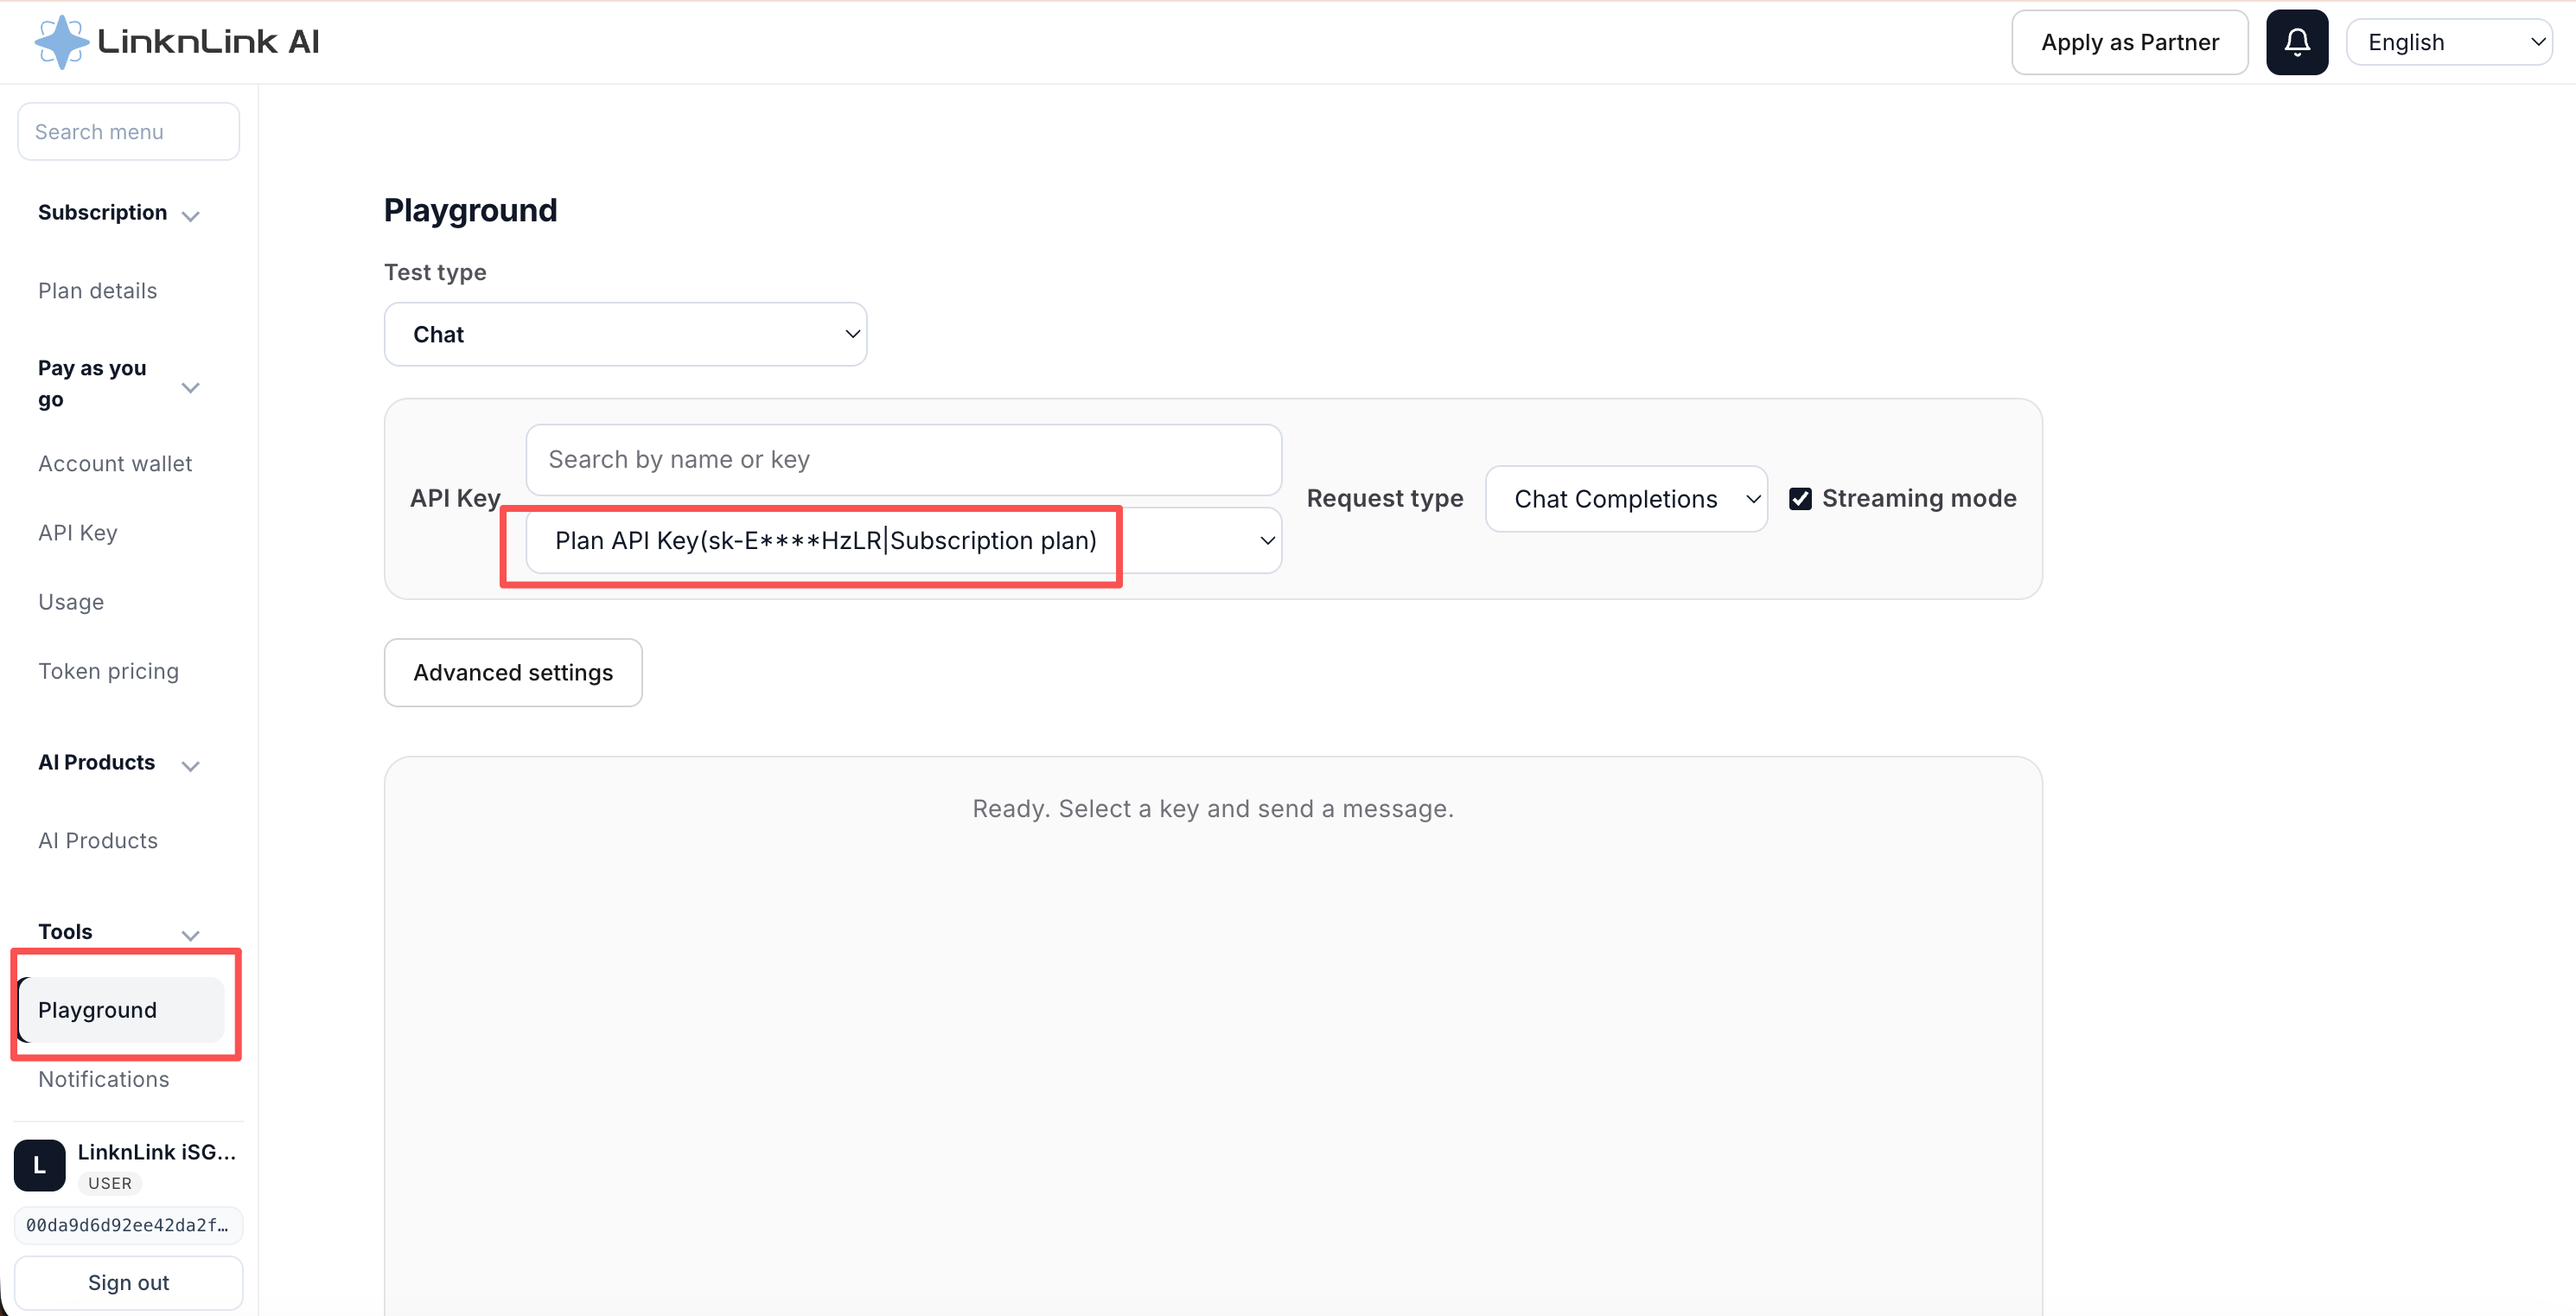
Open the platform's built-in Playground to test the plan key directly. You do not need to write or run a command in Terminal.
Select the plan API Key you copied in Plan details from the API Key dropdown.
Choose one of the models included in your plan, enter a short message, and send it. A model response confirms that the plan key and allowance are working.
Figure 10Test the plan API Key in Playground
After your test succeeds
Connect your tools
Use the API Key and Base URL from your selected billing path. Choose the guide that matches how you will use them.
7
Use your key in Codex or Claude Code
If you want to use your key in a coding tool on your own computer, the personal guide walks you through it on Mac, Windows and Linux. It also shows you how to go back to the original settings whenever you want.
For a team, one person sets up a shared gateway on a Linux computer and gives every colleague their own key. Your own key stays on that computer and never goes anywhere else, and any colleague's key can be switched off on its own.